Tuesday, May 12, 2015

Easy Baked Ziti w/ Spicy Sausage

Easy Baked Ziti with Spicy Sausage

My mother is Italian and I grew up eating a lot of pasta, so it's really no surprise that I cook a lot of pasta dishes for my family.  I love baked ziti because it has most of the flavors of lasagna with half of the work, it is great leftover, and it always reminds me of home.  My husband refers to it as my "default meal"... when I'm running out of dinner options, I can usually still make some ziti.
You don't have to use spicy sausage for this recipe, you can substitute any Italian sausage that you like.  However, if you want to give the spicy kind a try, this is a great dish for it, as the multiple cheeses help to balance out the heat of the sausage.
I got the sausage for this dish at the Story City Locker and it was delicious!  However, if you can't make it to Story City, you can use any good Italian sausage.  You also do not have to limit your pasta choice to only ziti - you can use radiatori, fusilli, penne, or anything you have on hand that will catch some cheese and sauce.  This is an awesome meal to make ahead and stick in the freezer for a lazy day!

What You Need;
 1 tbsp olive oil
1 lb spicy Italian sausage
1 box/bag uncooked ziti pasta
salt
3 cups marinara sauce (I use my own sauce, but you can use your favorite brand)
1 tub (15 oz) whole milk or part-skim ricotta cheese
1 cup fresh mozzarella (mozz pearls or larger balls cut into cubes)
1/2 cup grated Pecorino Romano or Parmesan cheese
fresh basil (for garnish)

Place a large pot of water over high heat on the stove.  When water boils, add a generous amount (1-2 tsp) of salt, then stir in pasta and cook according to package instructions.  *Make sure to check your pasta as it cooks and drain when it is al-dente.  Overcooked pasta is no good!  When pasta is drained, transfer it to a large baking dish and set aside.
While pasta cooks, heat olive oil over medium-high in a large skillet.  Add sausage and 2 tbsp marinara sauce.  As sausage cooks, stir often and break it apart into smaller chunks as much as possible. When the sausage is fully cooked, remove from heat.  Use a slotted spoon to drain any fat/grease from the sausage and transfer to the baking dish with cooked pasta.
To the baking dish, also add the cubed mozzarella and toss with the pasta and sausage.  Add the ricotta to the top in dollops with a tablespoon.  When you have added all of the ricotta, pour remaining sauce evenly over the top of your mixture and finish by sprinkling with the grated Romano cheese.
 At this point you can either cover the dish and place it in the fridge or freezer to bake later, or heat your oven and bake now.  When ready to bake, preheat oven to 375 degrees and allow ziti to come to room temperature before baking if it was refrigerated or frozen.  Bake, uncovered, for 30-40 minutes until sauce is bubbly.  Serve hot, garnished with fresh basil leaves torn into small pieces and enjoy!

Classy Jucy Lucy

The Classy Jucy Lucy

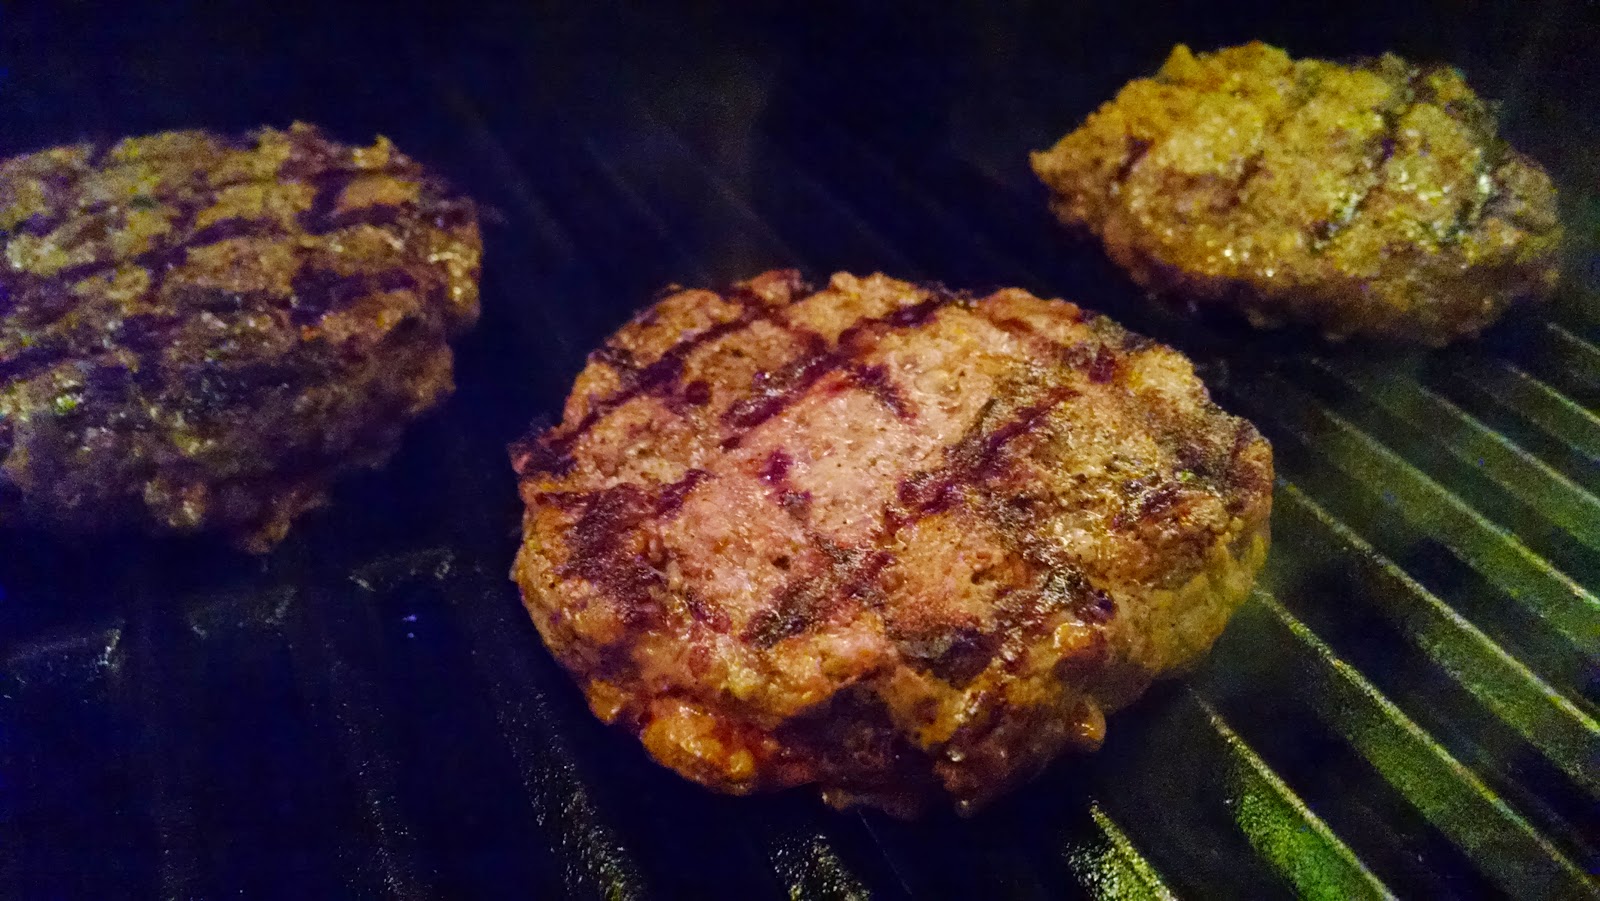
It's time to grill, people, and who doesn't love a great burger?  With, or without cheese... on a bun, or off... meat, or meatless... it's all good in the summer time!  My personal favorite is pretty much anything with cheese, so I have always thought the Jucy Lucy was brilliant idea.  For those of you who are not familiar with this gooey concept, the Jucy Lucy/Juicy Lucy is somewhat of a double cheeseburger, only much more amazing.  The Jucy Lucy is two burger patties with cheese placed between them, sealed around the edges, cooked to create a melty, gooey center and topped with more cheese... Like I said - amazing!

For this recipe I've classed it up a bit with my favorite cheese, smoked Gouda, and a couple of other fun elements.  I made my burgers with local ground beef from the Story City Locker, and you probably think, "ground beef is ground beef."  Well it is, until you've tried the fresh, local stuff... then you may think differently, because, like many other foods, nothing compares to fresh and local.  Anyway, give this a try with whatever you have and prefer, whether that is local beef, ground pork, or even a homemade veggie burger mixture.

What You Need:
1 lb ground beef (or other desired burger component)
1-2 Chipotle peppers in Adobo sauce
burger/grill seasoning
salt & pepper
3 slices of thick-cut smoked Gouda (or other smoky cheese)
6 slices of pepper cheese, such as Pepperjack, Habenero, or Hatch Pepper cheese
lettuce & tomato
3 burger buns

Place the ground beef in a bowl and break apart slightly with your hands.  Chop your Chipotle peppers and mix them, with 1 tbsp of the Adobo sauce, into the meat.  *Do not over work the meat - the more you mix, the more it loses it's natural tastes and textures.  
Divide the beef into three equal sections and, working one section at a time, make two thin burger patties out of each section, creating six patties total.  Use your fingers to make a slight well in center of each patty.  Place a thick piece of smoked Gouda in the center of three of the patties.  Place another patty on top of each of those and press down around the edges to seal the two patties together.  Sprinkle the top of each burger with salt, pepper and your favorite grill seasoning - I used Grilla Gorilla X from Saltlickers, because it's just so stinkin' good!  Gently pat your seasoning into the meat and set aside while you start your grill.
When you are ready to cook your Jucy Lucys, spray your hot grill with grill spray and place the burgers on the grate over medium-high heat.  Cook for 2 minutes, then use a metal spatula to turn each burger slightly to create diamond grill marks.  
Continue cooking for 2 more minutes, then flip the patties.  After flipping, top each burger with two pieces of pepper cheese and cover your grill.  Cook for 2 minutes, then turn slightly like before.  At this point you can also slice your burger buns (I actually used Asiago bagels this time) and place them around the edge of the grill to toast them slightly.  After 2 more minutes, remove the burgers and toasted buns from the grill and place on heat-proof plate.  Serve burgers topped with lettuce and tomato and enjoy!


Monday, April 6, 2015

Greek Stuffed Leg of Lamb

Greek Stuffed Leg of Lamb (boneless)


If you have never cooked a leg of lamb, you should probably give it a try.  This was a cut of meat that I had always wanted to tackle, but had never really had the occasion to do so.  So when I was visiting my friends at the Story City Locker and noticed the this amazing 6.5-pound boneless leg of lamb just hanging out in their freezer, I had to take it home with me!  
This is a great dish for a holiday meal or the next time you have a couple of extra guests joining you for dinner.  It's extremely easy and what I would call a "low-maintenance fancy" recipe.  It only takes about 20 minutes to put it all together and bakes in less than 3 hours with very little work in between.  This would also be delicious in sandwich form on fresh rolls if you have any on hand!

What You Need:

1 boneless leg of lamb (5-7 lbs)
2 small shallots
1.5-2 bulbs of garlic, depending on size
2 sprigs fresh rosemary
1/3 cup fresh mint leaves
1/4 cup sun-dried tomatoes
1 cup crumbled feta cheese
1/4 cup fresh parsley
1 lemon
olive oil
baking twine
salt & pepper
red wine
1 cup chicken stock
1/4 cup all-purpose flour


Unwrap the lamb on a clean work surface and carefully trim any large sections of excess fat.  Cut the lamb so that it can be spread flat on your work surface as pictured.

Peel the garlic and shallots, cutting the shallots in half.  Set aside 2 large garlic cloves for later.   Place garlic, shallots, leaves from 1 sprig of rosemary, mint and tomatoes in a food processor with 1 teaspoon olive oil.  Pulse on puree setting until all ingredients are minced.  Place the feta cheese in a medium mixing bowl and add the ingredients from the food processor.  Combine all ingredients and set aside.

Place remaining rosemary leaves and reserved garlic cloves in the food processor with the parsley leaves and the juice of half the lemon.  Pulse on puree setting until ingredients are finely minced.  Remove from food processor, place in a small bowl and set aside.
Preheat oven to 250 degrees.  While oven is heating, evenly spread the feta cheese mixture over the lamb, stopping about 1
inch from the edges.  Begin at one of the narrow ends of the lamb and tightly roll everything up together (this should create a more narrow, thicker roll).  Using 3-4 pieces of baking twine, securely tie up the rolled lamb from all sides.  If any of the cheese-herb mixture falls out, just stuff it back in.  Drizzle the outside of the stuffed lamb with a generous amount of olive oil (3-4 tbsp) and a bit of lemon juice.  *If you have a lemon-infused olive oil, you can use that instead and skip the lemon juice!  Sprinkle with salt and pepper, then rub the oil, salt and pepper onto the lamb to coat it.  Pat the parsley-herb mixture onto the lamb, evenly coating the sides and top.  
Place the stuffed lamb into a roasting pan, dutch oven, or other oven-safe pan.  Pour roughly 1/2 cup of red wine into the pan around the lamb.  Cover loosely with foil.  Place covered pan in preheated oven and cook for 1 hour.  After first hour, remove the foil and continue roasting for another hour.  After the second hour, carefully spoon some of the drippings/wine from the pan onto the top of the roast several times. Return lamb to the oven and continue roasting for another 30-60 minutes, until meat thermometer inserted into the lamb registers 135-145 degrees.  When lamb has reached your desired temperature, remove pan from the oven, place stuffed lamb on heat-proof cutting board and allow it to rest for 10 minutes before cutting.
While lamb is resting, make a gravy with the drippings/wine left in the pan.  If you are using a dutch oven, or other stove top-safe pot, you can place that on the stove and make the gravy in that pot.  If you cooked the lamb in a roasting pan, transfer the drippings to a stove top pot.   Turn burner on to medium heat.  To the dripping, whisk in a cup of chicken stock and 1/4 cup of flour.  Whisk constantly until gravy is bubbly.  Reduce heat to medium-low and continue whisking until mixture thickens (about 5 minutes).  Add salt and pepper to taste and remove from heat.
Remove the cooking twine from the stuffed lamb and cut into slices.  Serve lamb and stuffing topped with gravy and enjoy!

Sunday, March 15, 2015

Southwest Chorizo Mac & Cheese

Southwest Chorizo Mac & Cheese

Mac & cheese...  Seriously, is there any dish more versatile?  Is there anyone out there who doesn't like some form of it?  I'll tell you right now, the answer to both of these questions is no. I have personally spent a lot of time struggling to figure out the secret to making a creamy and gooey baked mac & cheese, but it was not until I purchased an actual mac & cheese cookbook that I learned what I was missing.  Bechamel sauce.  If you are not familiar with bechamel, it sounds fancy, but is super easy to make and only requires 3 base ingredients -
butter, flour and milk.
Bechamel is the key to any homemade Alfredo sauce, or gooey mac & cheese and I love using it because if you want your dish extra creamy, all you need to do is make some extra!
I had been wanting to make a meal with Chorizo (Spanish pork sausage) for a while, so the last time I was at the Story City Locker, I made sure to pick some up.  After putting this together, I really couldn't be happier about how this flavorful dish turned out!

What You Need:
1 lb bulk Chorizo Sausage
2 strips thick cut bacon
3 tbsp butter
3 tbsp flour
2-3 cups cream, half & half, or milk (whole, or 2%)
salt & pepper
1/2 tsp each cumin, paprika, cayenne pepper
1 Chipotle pepper (chopped) w/ 1 tbsp Adobo sauce
3 cups shredded cheese (at least 2 types, cheddar being 1)
1 cup fire roasted corn
1/2 lb uncooked pasta (macaroni or shells are ideal)
1 tbsp fresh chopped cilantro

Place a large pan on the stove over medium-high heat.  Once pan is hot, add the Chorizo and break apart the sausage as it cooks.  While Chorizo is browning, start a pot of water on the stove for your pasta.  When water comes to a boil, add a generous amount of salt and the pasta.  Cook to al-dente according to package directions.  When pasta is cooked, drain the water and place the pasta in a large baking dish, cover and set aside.  Once Chorizo is fully cooked, lower heat to medium and use a slotted spoon to remove sausage from pan and place in a heat-proof bowl lined with paper towels.  Set sausage aside and place bacon in the pot pan.  Cook bacon over medium heat, turning often, until fully cooked.  Remove bacon from pan and place on paper towels - set aside.
Drain any collected sausage/bacon grease from the pan, leaving about 1 tbsp still in the pan.  Over medium heat, add the butter to the pan.  Melt the butter, mixing it in with the reserved fat.  When butter is melted, whisk in the flour.  This makes a rue - the base of your bechamel sauce.  Whisk in the milk/cream, about 1/2 cup at a time until it is all incorporated.  Add the cumin, paprika, cayenne and salt & pepper to taste.  Whisk in
chopped Chipotle pepper and Adobo sauce.  Turn off burner and add the cheeses all at once.  Stir up just enough to incorporate but not melt all of the cheese.
Chop the cooled bacon strips and add them to your pasta in the baking dish along with the Chorizo and the corn.  Pour hot cheese mixture over everything and lightly toss all ingredients together.  At this point you can either place your dish in a preheated oven, uncovered, at 375 degrees, or refrigerate for later baking.  
Bake for about 20 minutes, until cheese is hot and melty.
 Remove from oven and top mac & cheese with chopped fresh cilantro.  Serve immediately and enjoy!

Friday, February 27, 2015

Rib-Eye Steaks w/ Grilled Poblano Butter

Rib-Eye Steaks w/ Grilled Poblano Butter

I'm going to let you all in on little secret...  I have not always had the best luck with cooking steaks.  However, and my husband can attest to this, I have come a long way from where I began.  That being said, I would like to tell you about the best steak I have ever eaten outside of a steakhouse.  
At my house we do a lot of grilling in the warmer seasons, so every year as the winter drags on, I begin to miss that mouth-watering grill smell more and more.  Well, last week when I saw a 34 degree day in our forecast, I gave in to my craving and headed up to the Story City Locker.  I came home that day with two freshly cut, 1.5" thick, boneless rib-eye steaks, each weighing in at 1.25 lbs.  I have to send a big "Thank You!" to Bobbi, Ty and the folks at the meat locker, because these were some seriously beautiful custom processed cuts of beef!
I was pretty excited to cook these, but honestly, I was also a little nervous due to their fantastic quality.  After a bit of debate with myself, I decided to go simple and fresh - I did next to nothing with the steaks themselves before cooking, and mixed up a fast and easy compound butter to top them after grilling.
If you are in search of a simple, yet indulgent dish to make at home, this is it...

What You Need:

2 boneless rib-eyes (1-1.25 lb each)
olive oil
freshly ground pepper & sea salt
2 large garlic cloves, peeled

1 poblano pepper
1 stick salted butter, room temperature
1 tbsp fresh cilantro, finely chopped
1/2 tsp paprika
1 tsp fresh lime juice
habaƱero infused sea salt (optional)

Remove steaks from the refrigerator and unwrap.  Drizzle steaks with olive oil and lightly rub oil onto both sides of each steak.  Generously sprinkle steaks with freshly ground sea salt and a little pepper.   Crush the garlic cloves and rub one on each steak.  Break each clove apart into 2-3 pieces and place them on the steaks.  Allow steaks to rest like this on your kitchen counter for 30-60 minutes.

While steaks are resting, prepare the compound butter.  Start your grill and allow it to reach about 500 degrees (with my propane grill this takes about 5-10 minutes on high heat).  When grill is hot, place the poblano pepper over medium-high flames and cook for about 15 minutes, turning every 4-5 minutes until all sides begin to char.  Remove pepper from grill and allow to cool slightly on a cutting board.  Once the poblano has cooled enough for you to handle it, peel off and discard the outer skin.  Finely chop  about 2/3 of the pepper (after removing the seeds if desired - leaving the seeds in will give your butter a bit more spice).
Whip the butter on medium-high speed in a stand mixer with paddle attachment for 3-5 minutes until soft and creamy.  Lower speed to medium-low and mix in the chopped pepper,  cilantro, paprika and a dash of habaƱero salt if desired.  Once all ingredients are well combined, scoop butter mixture out into a ball on a sheet of parchment paper or saran wrap.  Fold the parchment paper over the butter and form the mixture into a log-shape with your fingers on the outside of the paper.  Wrap and chill until steaks are ready to serve.

When you are ready to cook your steaks, get your grill nice and hot.  Place prepared steaks on the grill, over the flame in position for them to cook in the same amount of time.  Cover the grill and check back  4-5 minutes later.  Using tongs, turn each steak slightly to create diamond-shaped grill marks and replace grill lid.  After another 3-4 minutes, flip each steak and replace the lid.  After 4-5 minutes, repeat the diamond-shape steps from the first side.  After each side has cooked for a total of 7-10 minutes (depending on the thickness of the steak), use a meat thermometer to check the interior temperature of each steak.  A steak cooked to medium  should be about 160 degrees at it's thickest point.  If  steaks are not yet cooked to your desired temperature, flip and continue cooking for a couple more minutes on each side, then test again.
Once your steaks are cooked to your liking, use tongs to remove them from the grill and place them on a heat-proof plate.  Allow steaks to rest for 3-5 minutes before cutting.  Top each steak with 1 tbsp of  poblano butter and serve with the salad of your choice.

Enjoy!


Monday, February 16, 2015

Pot Roast Stew

Pot Roast Stew w/ Grilled Cheese


There are few meals more comforting during the cold winter (or any time of year) than hot soup and a toasty grilled cheese sandwich.  I always love a good tomato basil soup with fresh bread, or grilled cheese, but a rustic veggie beef stew is a close second favorite.  I had about 2.5 pounds of local grass fed bottom round roast from the Story City Locker that I couldn't wait to use and this meal was calling my name.
I created this stew by combining two "Philadelphia inspired" recipes from a counter top cookbook given to me by my mom.  The original recipes were for Yankee Pot Roast and Beef Stew, both of which I altered a bit as I usually do, and I thought they would be great rolled into one.  I like to start this on the stove and finish it in the oven, but you can also throw it all in a Crock Pot if that's what you prefer... Either way, it's a very rustic, Earthy dish that can easily be added to if you like things a bit spicier, or maybe want more veggies.  Enjoy!


What You Need...
For the Stew:

3-4 pound Beef Round Roast (top or bottom)
2 tbsp butter
1 small onion, chopped
5 carrots, peeled and chopped
4-6 gloves garlic, minced
fresh thyme (2-3 sprigs)
salt & pepper
2 cups beef or chicken broth
1/2 can or bottle wheat beer
32 oz crushed or diced tomatoes
8 oz tomato paste
1 large russet potato, peeled and cubed
roasted peppers, celery (optional)

For the Grilled Cheese:
cottage or sourdough bread (2 slices for each sandwich)
butter
mayonnaise
your favorite firm, but melty cheese
garlic powder

First, melt the butter in a deep, heavy pot over medium-high heat.  Once butter is hot, add chopped onion, carrots and garlic.  When onion begins to become translucent, move ingredients to the sides of the pot, creating an open space in the center.  Place the roast in the center of the pot and place thyme sprigs around the roast.
 Sprinkle generously with salt and pepper.  *I like to use habanero infused sea salt to add a little something extra to dishes like this.  These types of salt can be a little pricey, but they come in a variety of infused flavors and totally worth the money!
Add the broth, beer, tomatoes, paste and potatoes.  At this point you can also add any other veggies you may want.  My favorites are roasted red peppers for a little sweetness, or roasted Poblanos for a mild heat.  *Refer to my "Make Your Own... part 2" post from 3/10/14 for instructions on roasting your own peppers!
Cover the pot and reduce heat to low.  If using an oven-safe pot, you can simmer this in the oven at 250 degrees for  1-2 hours depending on the size of your roast.  If not, you can continue simmering on the stove at the lowest temperature for 1-2 hours.  Check the interior temperature of your roast using a meat thermometer to make sure you have reached at least 155-160 degrees.
When roast has reached the proper temperature, remove it from the pot and place on heat-proof cutting board.  Allow roast to sit for 5 minutes.  Now, you can either cut the roast into chunks (about 1 inch), or pull/shred it if tender enough.  Depending on the type of roast you use and how long it takes to cook, you may or may not be able to pull the meat.  Once you have all of the meat cut or shredded, mix it back into the pot with the vegetables.
To make the grilled cheese, melt 1 tbsp butter over medium heat in a pan/skillet.  Spread mayo on one side of a slice of bread.  When butter is hot, place the bread (mayo side down) in the pan.  Layer a combination of cheeses on the bread (I used smoked cheddar and Jarlsberg), sprinkle with garlic powder and top with another slice of bread.  Cover with a lid (of any size - even if it doesn't fit the pan) for 2-3 minutes to keep heat and moisture around the sandwich and help melt the cheese.  When bottom side of the sandwich is golden brown, flip it and cover for another 2 minutes until cheese is melted and both sides are browned.
Serve your grilled cheese with stew on the side - this is a delicious combination!

Friday, February 6, 2015

Braciole (Involtini)

Braciole (Involtini) - An Italian Classic

I cook a lot of Italian meals for my family, but braciole - pronounced "brajole" or "brazole" - is one of our favorites.  This dish consists of thin cuts of either beef, or pork (I always use beef) stuffed, rolled and slow cooked in a simple tomato sauce.  Braciole can be made using a variety of cuts of meat, including flank steak, bottom round, or top round.  Today I am using two different cuts in order to compare - a grass fed bottom round and a corn fed top round.
(left) bottom round roast - (right) top round roast
I stopped in to see my friends at the Story City Locker this week and picked up a 2-pound corn fed top round roast and a 3.5-pound grass fed bottom round roast.  In the past I have used both top and bottom round to make braciole, but I did not know much about the differences between grass fed vs. corn fed.  While visiting with Bobbi, co-owner of the Locker, she told me that grass fed beef is typically leaner and more flavorful. However, she also said that the corn fed would be more tender and juicy.  So we decided that I would try both and report back.
I took three slices off of each roast and wrapped the remainder of each to use later in the week.  I prepared and cooked both cuts exactly the same way. I was told that if cooked low and slow, the grass fed would still be almost as tender as the corn fed, which was my hope.  However, when you make braciole, the rolls are seared in the pan before the sauce is added and temperature is lowered.  This part of the process did cause the grass fed rolls to be a bit more chewy, but it was the consensus at my table that the grass fed did have a more noticeable nice beef flavor.  Both cuts turned out delicious, though, so here's the recipe...  When you're ready to try it, head up to Story City Locker, or your local butcher and pick up something fresh and local for your family!

What You Need:

everything you need for a delicious meal 
Top Round Roast (at least 2lbs)
Grated Parmesan, or Pecorino Romano (1/2 cup)
Fresh Parsley, chopped (about 1/4 cup)
Fresh Garlic (6 large cloves)
Salt & Pepper
Sliced or Shredded Provolone (1 slice per roll you plan to make - I made 6)
Sliced Prosciutto or Pancetta (1 slice per roll)
Baking Twine
Olive Oil
Red Wine (1/2-1 cup)
32 oz Tomato Sauce, puree, or crushed tomatoes
Fresh Basil, chopped (about 1/4 cup)                                                                                      
your favorite pasta                                                                                      

Begin by slicing your roast into 1/2-3/4 inch thick slices.  Trim any excess fat, then cut horizontally across the top of the roast, creating the largest slice possible while still keeping pieces thin.  I always make at least 1 roll per person I am feeding, so make as many as you need for your family.  Lay the slices out on your cutting board, or clean counter top.  Sprinkle each slice with Parmesan, salt and pepper.  Chop half of garlic fairly small and set the rest aside.  Evenly divide chopped garlic, parsley and about 1/3 of the basil between each slice of beef, sprinkling them around the entire slice.  Top each piece of beef with one slice of provolone and one slice of prosciutto/pancetta.
Cut your baking twine into pieces that are roughly 10-12 inches long, you will need two or three pieces of twine for each roll.  Roll each piece of beef from small end to small end - the braciole will be sort of short and fat, not long and skinny.  Tie each roll with at least 2 pieces of twine.  I tie the twine in a bow whenever possible to make them easier to untie when it is time to eat.
At this point, if you are making these ahead of time, you can wrap up your braciole and put it in fridge to cook anytime in the next 48 hours.
To cook your braciole, place a heavy pot on the stove over medium-high heat.  Add enough olive oil to coat the bottom of the pot (3-4 tablespoons).  While oil is heating, cut remaining garlic cloves into slivers.  Add garlic and beef rolls to the hot oil together.  Turn the braciole every 3-4 minutes to brown on all sides.  *If your pot is not large enough to sear all rolls at once, do a few at a time, take them out and set aside while you sear the remaining rolls.
Once each braciole is browned, return any that you removed back to the pot and add the red wine and
basil.  I like a stronger red wine flavor in my sauce, so I add roughly one cup, but if you want a milder flavor you can cut it down to 1/2 cup.  Lower heat to medium-low and allow wine to reduce and simmer for about 5 minutes.  When wine has reduced a bit, add the tomato sauce, a sprinkling of salt and pepper, and cover.  *I like to use a plain tomato sauce or crushed fire-roasted tomatoes, but if you prefer a thicker sauce, you can use a puree.
You now have two options for how you choose to finish your braciole...  I cook mine in a dutch-oven style pot, the reason for this being that I can place it in the oven for the last hour of cooking.  If you use this method, simply preheat your oven to 250 degrees and after covering your pot, place it in the center of the oven for one hour.  If you are not using an oven-safe pot, you can finish slow cooking on the stove over very low heat for one hour.
(unsliced) Braciole served with Angel Hair Pasta

Shortly before serving, cook your desired pasta in salted, boiling water until al-dente.  Drain pasta, and serve with sliced braciole, a generous spoonful or two of sauce and sliced, untied braciole.  Top with freshly grated Pecorino Romano or Parmesan cheese.

 Enjoy!